Take in Waist of Khakis
Note About Dress Pants:
Some pants have a seam in the center back of the waistband. If yours do, use the easier directions I have HERE. Just change Step 4. Instead of marking your new stitching line to the right of the existing stitches, mark it to the left. All the other instructions remain the same.
To take in the waist you correct that gapping in the back
when the wearer sits down.
People with a skinny waist and larger hips will really appreciate
this tutorial.
In order to take in the waist of a pair of khakis you need to get
creative. The alteration is complicated by the fact that khakis usually
have no center back seam. The pants have a center back seam, but the
waistband does not. This means that you have to make a center back seam in order to reduce the size of the waistband.
This is a Multi Step Process
In this example, I will take in the waist 3½". This is the absolute
maximum to remove, and may be too much if your pants are not a large
size.
- First, separate the waistband from the pants.
- Next, take in the seat of the pants, from waist to crotch.
- Following that, create a new seam in the waistband and take it in enough to match the seat of the pants.
- Lastly, put it all back together, replacing the beltloop if necessary.
A Note About Pinning...
Just to be clear, here, I use pins as marking tools in most of my
alterations. They do double duty, since they also keep the fabric in
place. I use the point where the pin enters the garment as my
line of marking. You may be more comfortable marking with an invisible
marking pen, chalk, or even a line of basting. These all work great.
Whatever will give you the most professional results is the tool for
you! The instructions here are meant to give you guidance in altering
clothing. Adapting them to your style will give you the greatest
success.
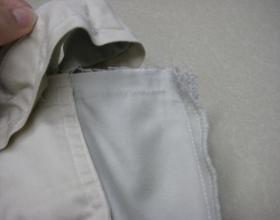
Chart One: Separate Waistband from Pants
|
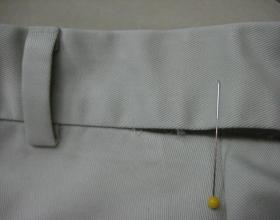
STEP ONE: OBSERVE
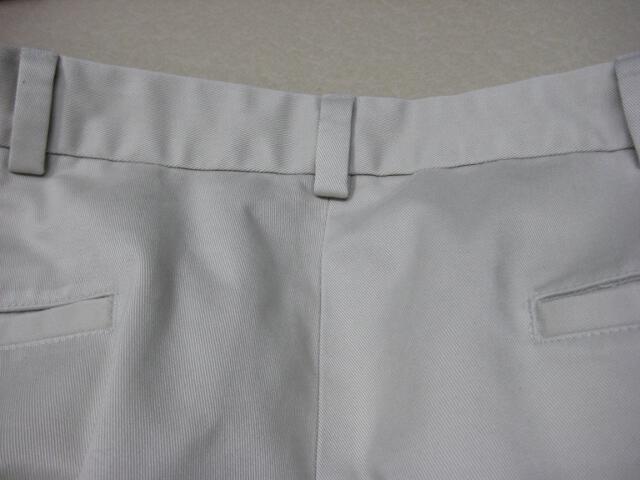
Check out the garment before you start to work on it. Take pictures, if you can. Note the single beltloop in the center. Some pants have two beltloops a few inches on either side of the seam.
|
|
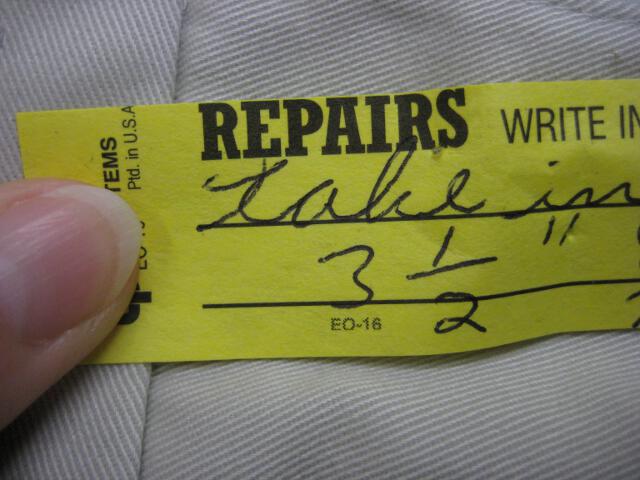
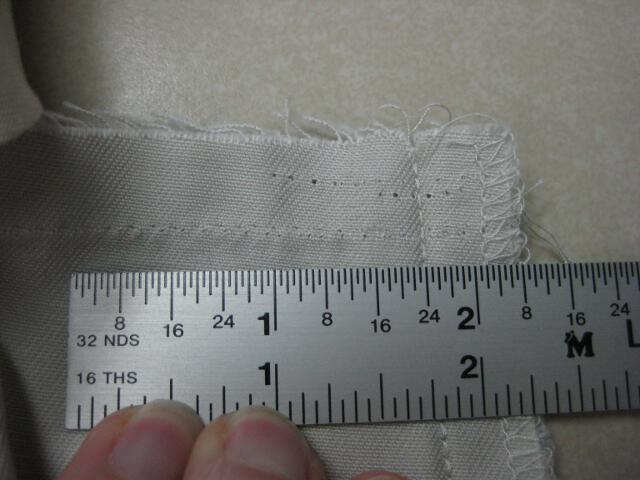
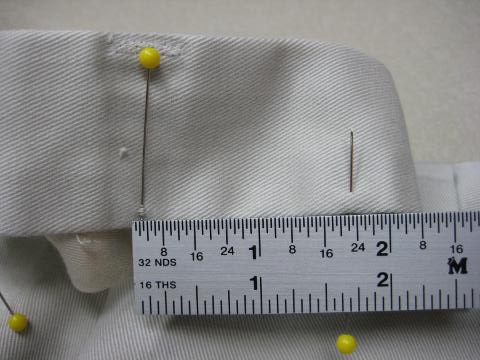
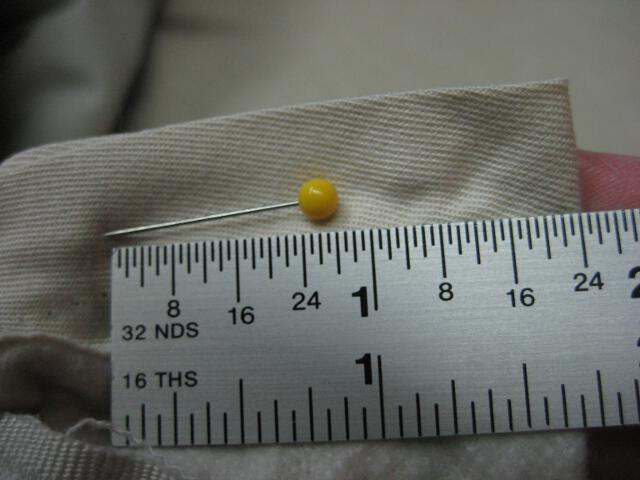
STEP TWO
Double check the measurement and write it down somewhere. You can see here that it is 3.5 inches. This is a dramatic amount to take out of the waist. These are large size pants.
|
|
STEP THREE
Using a seam ripper, remove the beltloop. Pin it to the garment so you know where it is when you need it.
|
|
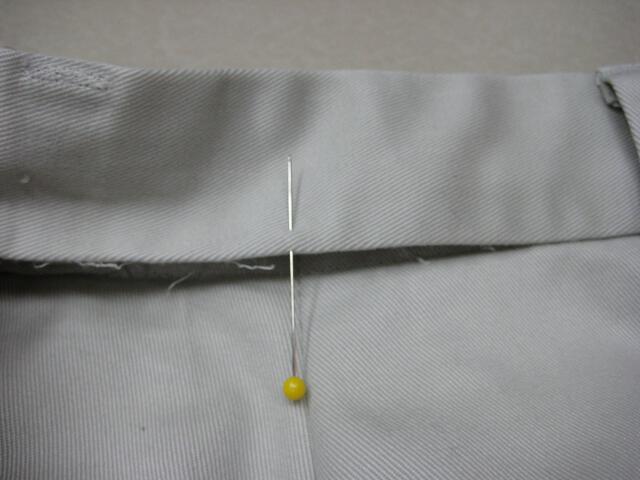
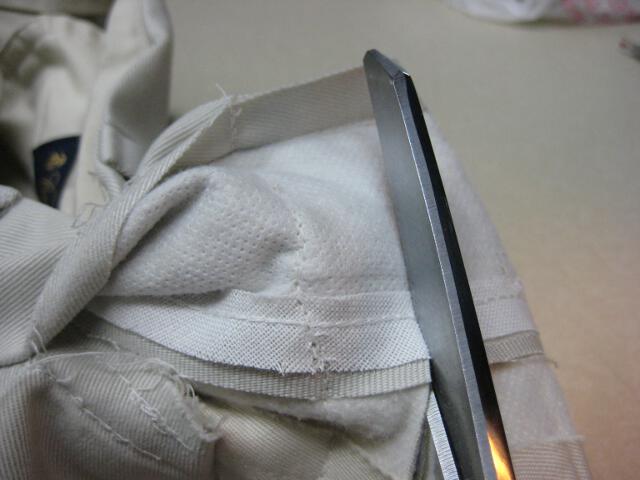
STEP FOUR
Beltloop is off. Using a seam ripper, partially separate the waistband from the pants. Rip from the center toward the sides. Rip the amount you're taking out plus 4". Here I will rip a 7½" gap between band and pants.
|
Chart Two: Take in Waist Through Crotch
|
STEP FIVE
Turn pants inside out. Scoot the waistband out of the way. Lay existing center back seam facing right. Flatten it with the top raw edges meeting. You can press the seam flat if you want.
|
|
STEP SIX
Divide the amount you are removing by 2. This will be the amount you are moving the line of stitching to the left. You divide by 2 because the fabric is double thickness here. In this case, 3½" divided by 2 is 1¾".
|
|
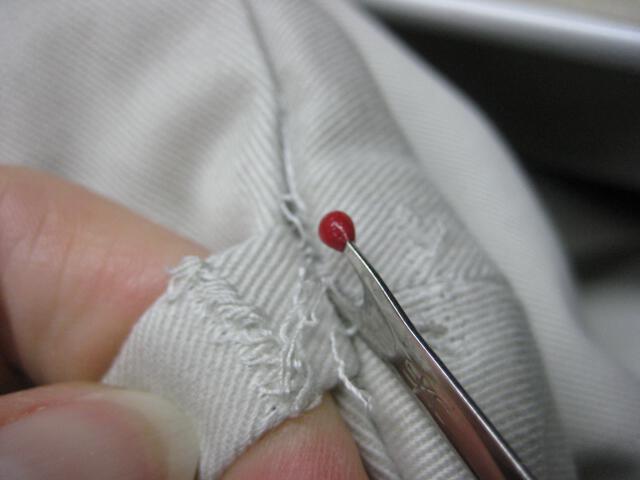
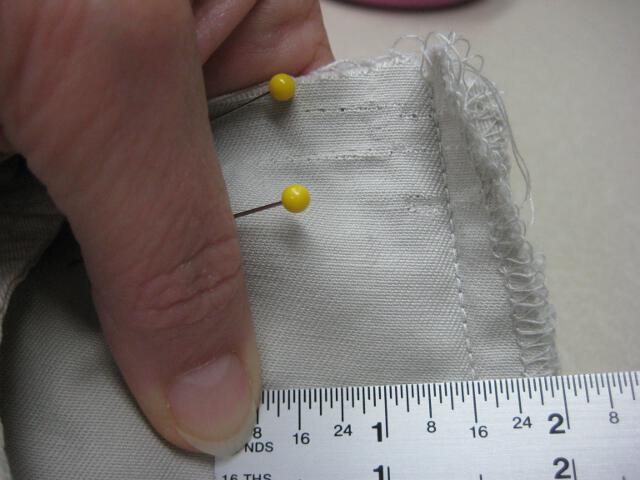
STEP SEVEN
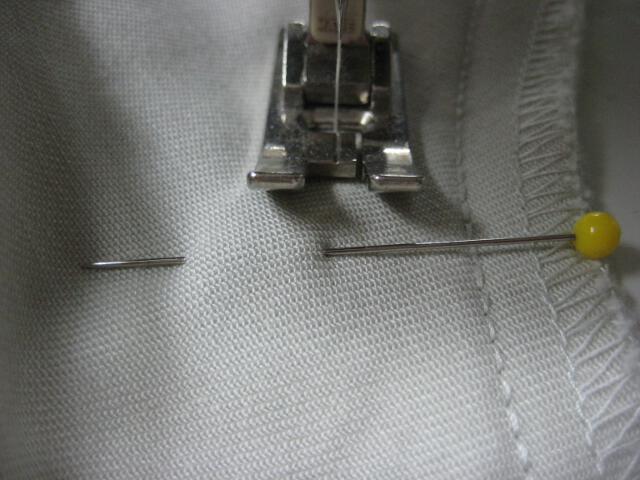
Place a pin near the waist to mark your new stitch line. Continue pinning down the length of the crotch, tapering as you go. Here you see that at a couple inches down, I am pinning 1½"
|
|
STEP EIGHT
Continue marking, with pins or a marker, until you have tapered the new seam into the existing one. Joining the new marks with the old seam should happen gradually, 12" or more from the waist.
|

|
STEP NINE
Stitch your new center back seam, following the pins. You will start out at the waist and follow your pin marks toward the crotch of the pants. Make sure your tapering is gradual.
|
|
STEP TEN
Here we are getting close to the crotch. The stitching is only a half inch or so from the existing stitching.
|

|
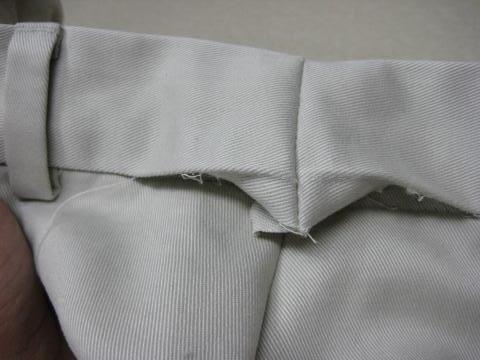
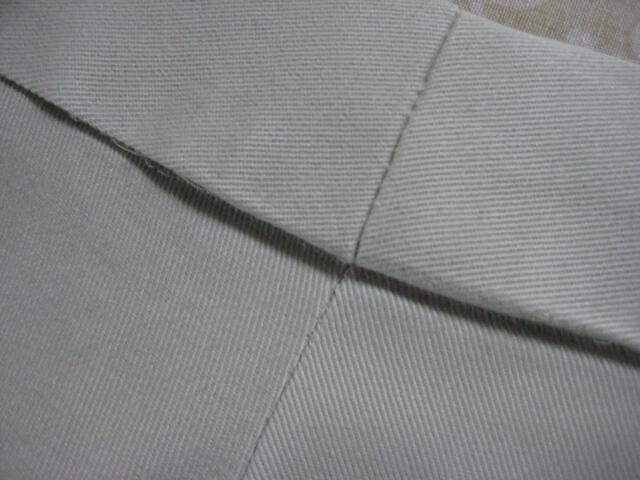
STEP ELEVEN
Here you can see that the stitching lines have met. If you have angled this new line gradually, your seat seam area will be smooth.
|
|
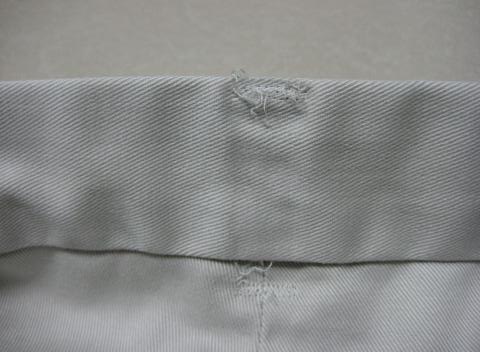
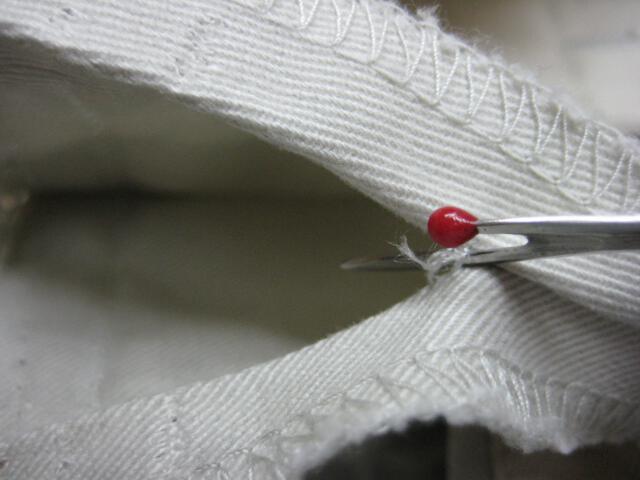
STEP TWELVE
Remove the original center back stitching. You can use a seam ripper or a blade. Sometimes the existing stitching is a chain stitch, and you can pull it all out in one continuous length.
|
|
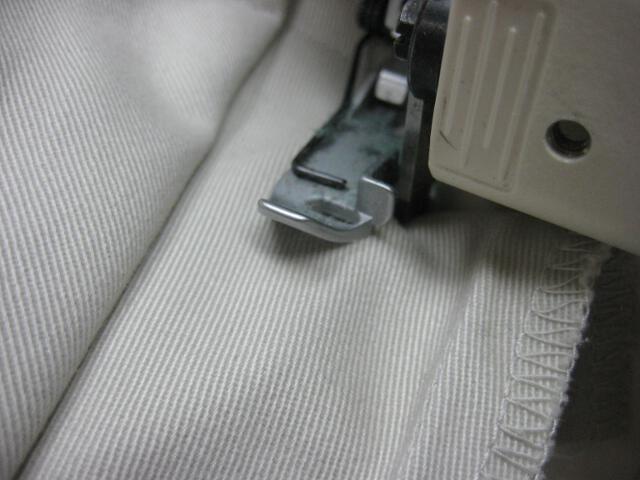
STEP THIRTEEN
Open the seam allowance. Leaving about 1" per side, serge the excess from the new seam allowance. Then you can let the pants out later if necessary. Taper into the existing serging.
|
|
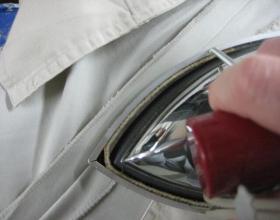
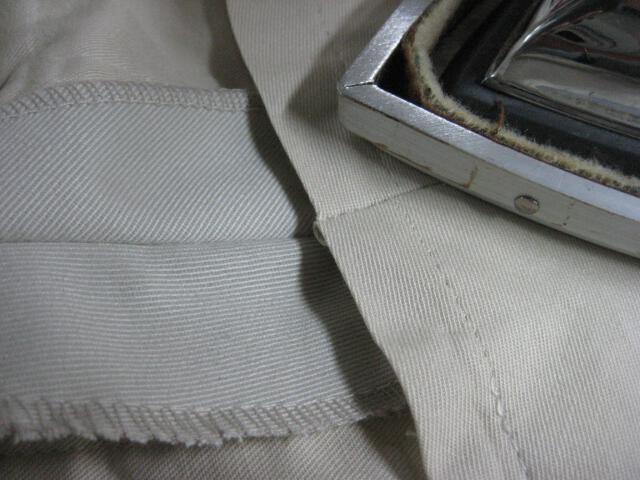
STEP FOURTEEN
Press the new seam. First press double thickness, to set the stitches. Then press it open, on the inside of the pants. Then press the right side of the pants.
|
Chart Three: Create Center Back Seam in Waistband
|
STEP FIFTEEN
You now have a waistband that is much bigger than the waist area to which it attaches. Smooth out the left side of it and put a mark (pin) where it lines up with the new center back seam.
|
|
STEP SIXTEEN
Repeat that process on the right side. Smooth the waistband and mark where it meets the center back seam.
|
|
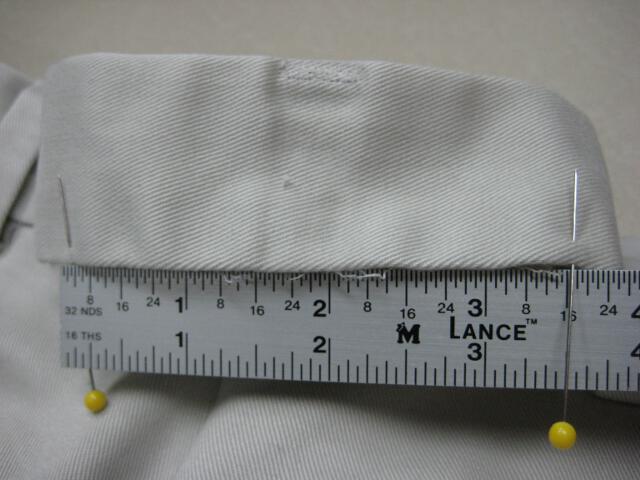
STEP SEVENTEEN
Now you have a section of excess waistband that is between the pins. It should measure exactly the same amount that you originally needed to take out of the waist. Here it measures 3½".
|
|
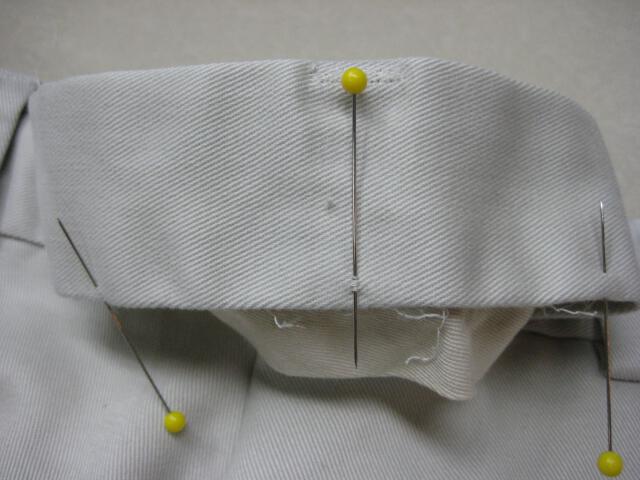
STEP EIGHTEEN
Mark the center of this section of excess. Either measure and divide by 2, or fold it in half, matching your two pins, then mark the fold (halfway point). It will be at the beltloop, if you had one in the center.
|
|
STEP NINETEEN
Double check that each section measures half the original amount to be take in. Careful attention to detail here prevents your seam from being off center when you connect the waistband to the pants.
|
|
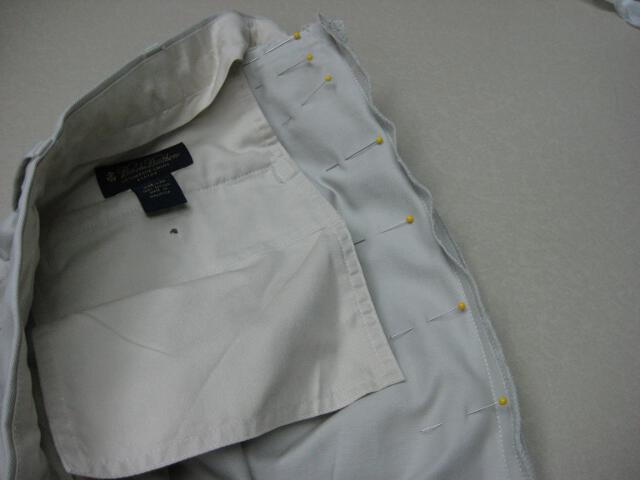
STEP TWENTY
Leaving only the center pin in place, flip the waistband inside out. Fold it at this center mark (pin). Measure inward the amount that you wrote down in Step 19. Pin from end to end.
|
|
STEP TWENTY ONE
Sew the new seam into the waistband. It gets stitched the same amount from end to end. Do not taper. Sew slowly, as the fabric tends to bunch up and get misaligned.
|
|
STEP TWENTY TWO
Make sure the new seam is straight and smooth. Restitch it if there is any buckling or unevenness. Pay particular attention to where the seams intersect, midway through.
|
|
STEP TWENTY THREE
Once you're satisfied, trim the excess. Leave a seam allowance of at least 1", so you have room for adjustment. For a smaller alteration, just split the fold, so you can press open.
|
|
STEP TWENTY FOUR
Flip the waistband right side out. Open the seam allowance. Fold the raw edges to the inside along the fold line. Check the seam's alignment with the pants. Rip and restitch if needed to get them to match.
|
|
STEP TWENTY FIVE
With pants inside out, press waistband into place. Make sure the top of it lays flat. Fold under the 'tails' of the seam allowance if they stick out.
|
|
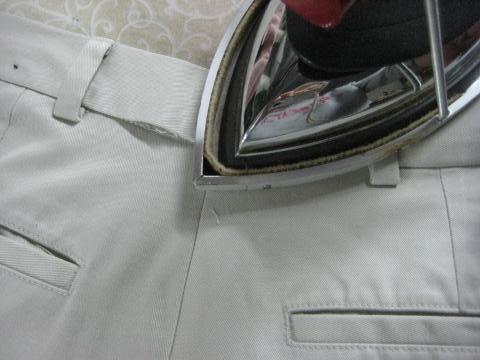
STEP TWENTY SIX
Turn the pants right side out and press again. Check that the seams match. You can shift the waistband if it is slightly off line and use steam to keep it in place.
|
|
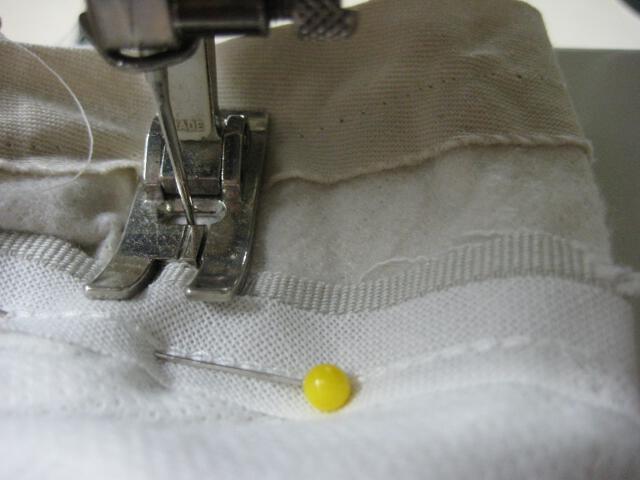
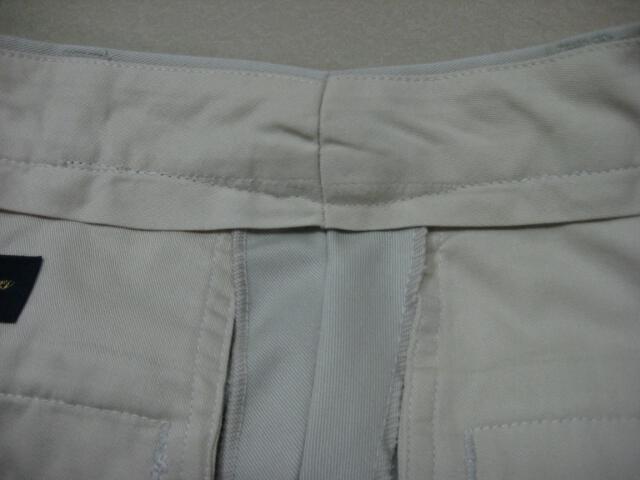
STEP TWENTY SEVEN
Here is the center back area, pressed into place. The top is straight across and the seams match. Stitch from beltloop to beltloop, on the right side, as close to the bottom fold as possible.
|
|
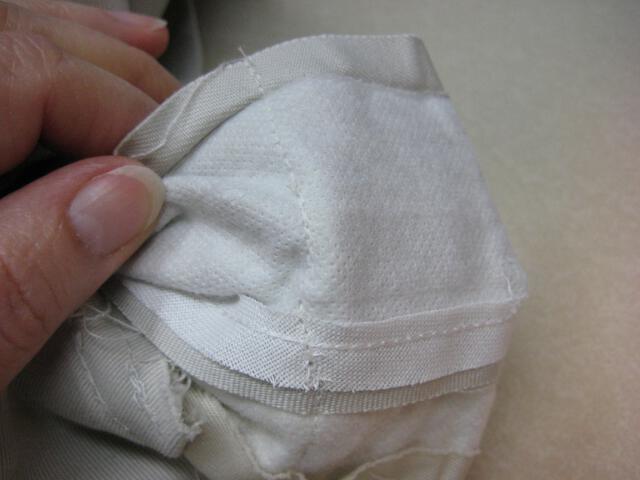
STEP TWENTY EIGHT
Here you see the inside of the pants after the waistband has been attached. Although the seam will not be seen, it should still look nice.
|
|
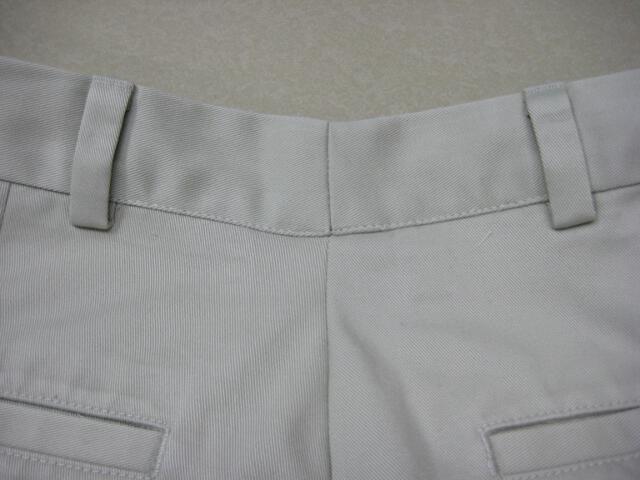
STEP TWENTY NINE
Here is the outside view. Extending the stitches from beltloop to beltloop makes them look original to the garment. You may not need the extra beltloop, either. The two remaining ones may be close enough.
|
What an involved alteration! It is definitely not for everyone. Getting
the two seams to meet is tricky, and often requires that you rip that
waistband seam out and shift it a little until it matches the seam in
the pants.
If you're looking for an easier waist alteration, You may want to try
taking in a drawstring waist.
It works on a totally different style of pants. It's something that you
may need when altering swim trunks, elastic pants, or children's wear.
When altering the waist of a pair of khakis, you have to put in a lot of
effort. What you get in return for all your work, though is a great
fitting pair of pants. You don't have that gapping in the back when you
sit down.You can also do this alteration on a pair of jeans. It works
especially well if you have a beltloop that hides the seam. Then if
you're seams are slightly off line, it doesn't show.
Return from Take in Waist to Alterations Home Page