Shorten Shoulder Straps on a Casual Dress or Top
A Few Words about the Dress used in this Example...
Shoulder straps in casual dresses are attached in a variety of
ways. It will be helpful to know a little bit about this dress before
you read the instructions.
The back of this dress has an elastic casing from side seam to side
seam. The elastic is barely stretched, so when the wearer has it on, it
doesn't even look like it's there. Its function is to snug the dress up
close to the back to minimize gapping.
I did not want to remove the stitching or the serging that runs
along the lowere edge of the casing. It's really not necessary. I chose
to cut the strap at this point (Step 3) in order to preserve the
integrity of the dress.
A Word About Measuring...
The shoulder straps here each need to be shortened an equal amount.
Now Let's Get Started...
|
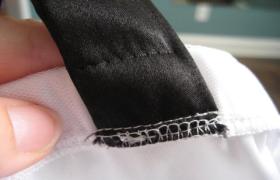
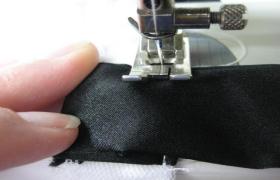
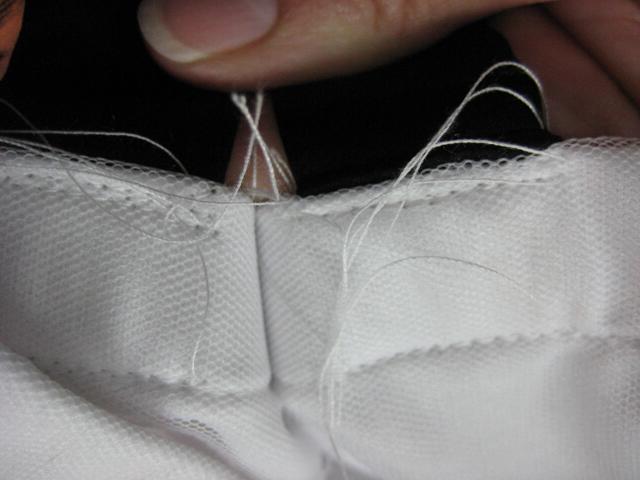
STEP ONE: OBSERVE
This shoulder strap is attached to the dress in two places. I'll only remove the stitching at the part of the strap nearest the edge of the garment.
|
|
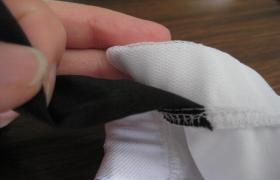
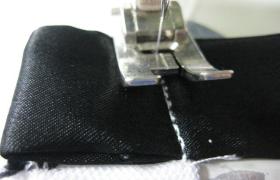
STEP TWO:
You can see here that I have removed this stitching, but the strap is still attached at the serged edge. We will leave this alone.
|
|
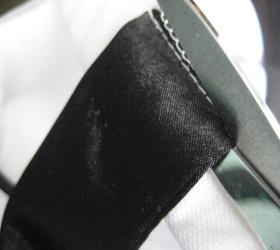
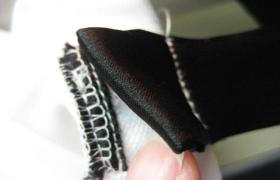
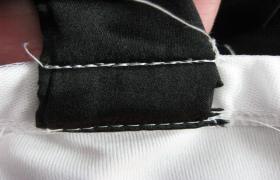
STEP THREE:
The serging here provides two functions. It seals the raw edges of the upper edge and strap.It also encases the elastic that's in the self facing of the dress. So, cut the strap away, rather than remove the stitches.
|
|
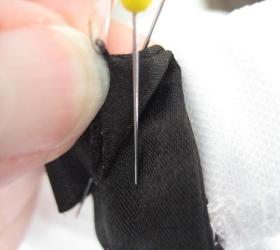
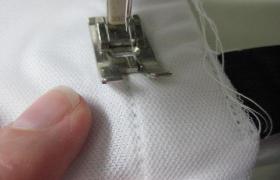
STEP FOUR: After shortening the strap your determined amount, fold up raw edges and pin. Be sure you've taken into account the amount of strap to be hidden on the inside of the dress.
|
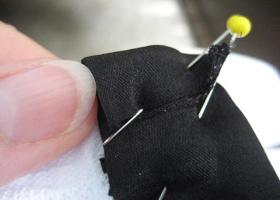
|
STEP FIVE:
Align this folded strap edge along the top edge of the dress, on the inside. Refer to Step 5 for the finished look. Stitch into place using thread color to match the dress.
|
|
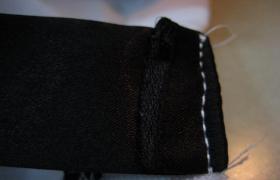
STEP SIX:
Here is a close up of the INSIDE of the shoulder strap, showing how it attaches to the top edge of the dress back.
|
|
STEP SEVEN:
The bird's eye view, here, showing how the strap is attached to the dress. Line it up with the little piece of strap that we left behind when we cut it.
|
|
STEP EIGHT:
Fold the strap so that it's bottom edge is even with the bottom edge of the dress's elastic casing. Wrong sides will be together and the strap fold will cover up that little piece that we left behind.
|
|
STEP NINE:
Stitch strap in place. Make your stitches in the same spot you sewed in Step 6. You will need a size 18 needle or jeans needle to get through all the layers.
|
|
STEP TEN:
Sew over the same stitching several times. Pay attention that your stitching exactly over the stitches, otherwise it will look messy.
|
|
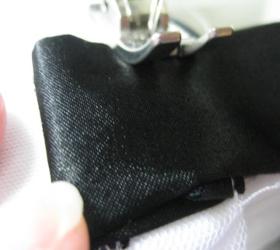
STEP ELEVEN:
So far, the strap is attached at the top edge of the dress. However, the bottom folded edge needs to be sewn down. Line it up and pin it in place.
|
|
STEP TWELVE:
Stitch it into place. Sew this on the right side of the dress and stitch in the ditch that has been made by the manufacturer's stitching.
|
|
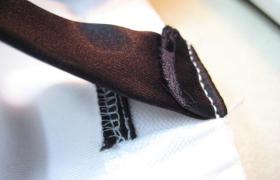
STEP THIRTEEN:
Here is a close up of the INSIDE of the strap. It is attached at both edges of the elastic's casing. Measure each strap to make sure they are the length you want them.
|
|
STEP FOURTEEN:
Here is a way to check your work. If the straps are meant to be the same length, pinch the center back in so that the straps touch each other and are even in the back. Compare to see if they're also even in the front.
|
|
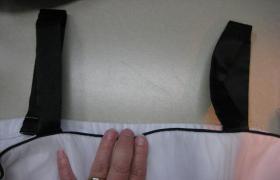
STEP FIFTEEN:
Here is the end result, viewed from the front. If you look closely, you can see the new strap on the left back of the dress.
|
This shoulder strap alteration is a simple process that has great impact
on the fit of the dress. It raises the bust area to where it belongs.
It shortens a gaping armhole that is cut too low. It also allows the
back of the dress to fit flat against your back. It is the first area I
look at in a fitting, because the results can be so good!
Return from Shoulder Straps to Alterations Home Page